My friend Jackie successfully made her first pandan chiffon cake last week using the recipe I posted
here. It was very nice of her to share her experience with me! Seemingly on a baking spree, she sent me a text 2 days ago asking for a scone recipe. I'm usually very lazy about typing out recipes but since I have to do it in order to email the recipe to her, I thought I might as well post it up for anyone else that might be interested, along with my 5 cents worth of tips. =P

Scones are probably one of the least time consuming items to make when it comes to baking, yet it is often said that the ability to bake light, flaky, golden scones has long been considered the test of a real baker. I don't know about that... but I do know that baking a successful batch of scones can be easy once you take note of certain essential key points. I figured some of these out the hard way (= lots of failed, trial & error attempts) since many recipe books don't spell it out that specifically for you.
1. Cut butter into small pieces before adding it into the flour.
2. Butter should be cold while its being worked into the flour.
3. Do not over handle the dough. This is probably the most important point of all! I usually mix in the wet ingredients with a spatula (no hands) until a soft dough forms. Remember to stop mixing once the ingredients come together - under mix is often enough. Over handling will result in rock hard scones.
4. Depending on humidity conditions, flour absorbs different amounts of liquid. Freshness of the flour is also a factor. If you find your dough too sticky and difficult to roll into required shape, just add more flour. Conversely, if your dough is too dry, add more water.
There are tons of scone recipes out there, many yummy variations with milk, buttercream, yogurt, etc, plus all sorts of possible flavorings (raisins, nuts, seeds, fruits, etc) but here's a fairly simple one that I use often with sultanas (Recipe from periplus mini cookbooks, slightly adapted. Photo was taken sometime back - I used raisins instead of sultanas on that occasion.):
Ingredients:
2 cups self-raising flour
30 g butter
1/3 cup caster sugar
1/4 cup sultanas
1 egg, lightly beaten
150 ml milk
Method:
1. Preheat oven to 220 degree celsius.
2. Sift flour into a large bowl, add butter and rub in lightly with fingertips till mixture resembles fine bread crumbs.
3. Mix in sugar and sultanas.
4. Combine egg and milk.
5. Make a well in the centre of the flour, pour in egg & milk mixture all at once, reserving about 1 teaspoon for glazing. Mix quickly to a soft dough.
6. Turn onto a floured board (use self-raising flour). Knead lightly. Press or roll out to form a round about 2 cm thick.
7. Cut using a floured plain round cutter or cut into triangles using a floured knife.
8. Place on greased oven tray and glaze with milk mixture (from step 4).
9. Bake for 10-12 minutes in preheated oven.
10. Cool on wire rack.
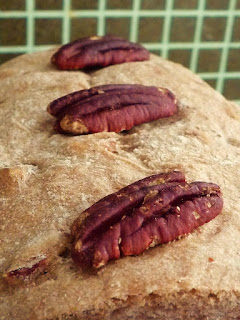
 Still on my bread making spree, a few days ago I tried another recipe from the new bread recipe book mentioned in my last post.
 The recipe in the book calls for walnuts but I had half an open pack of pecans so decided to give my pain aux noix a little twist by using pecans instead of walnuts... I'm not sure why walnuts are usually used - perhaps its more flavorful? I'm making a mental note to try it again with walnuts.


