Friday 12 October 2012

Rose & cranberry cookies, and a little about my 2012 so far

Oh dear, is anyone still reading this blog? =P  Seems like ages since I last posted... I apologize to anyone that has been visiting for how quiet it has been here.

(clockwise from top left: rose & cranberry cookies, coffee & dulce de leche macarons, blackberry mouse on biscuits à la cuillère, with peach mouse insert and biscuit joconde base and earl grey chocolate macarons)
 
With the first 9 months of 2012 behind us, yesterday I heard a friend ponder out loud - where did 2012 go?  It got me thinking that the first 3 quarters of this year, and in particular the summer, did go by rather quickly for me, which tends to happen when there is a lot going on.  I started the year with a couple of months working from home, then it was adjusting to a new office and role at work in central Hong Kong as opposed to being at ICC in Kowloon, then it was planning for our beautiful wedding which took place in Bali, Indonesia, in August (and I know I haven't mentioned the wedding at all till now), then we also got ourselves a new home which we basically tore everything out and started the design and renovation works from bare walls and flooring.  2012 has been good so far and I'm very thankful.


Right now I'm looking forward to moving into our new place by early next month.  I'll have a new kitchen to work in, including a new oven which always takes some time getting used to.  The last quarter of any year tends to be my favorite for a number of reasons - the weather cools down considerably; i really enjoy Christmas and the feasting that comes with the holiday season; both Herr Scherrer and I have our birthdays in October; work at the office tends to slow down; we usually start planning for next year's holiday trips which gets me happy and excited.


I've accumulated quite a backlog of recipes and pictures of bakes that I want to share here, but as I was composing this post I couldn't decide what to share first.  Do I go by chronological order? Alphabetical?  I eventually decided on posting up a collection of photos taken the last few months and will endeavor to share recipes and/or sources of these in the next few posts.  Please leave a comment if you have preference for any to be posted first. 

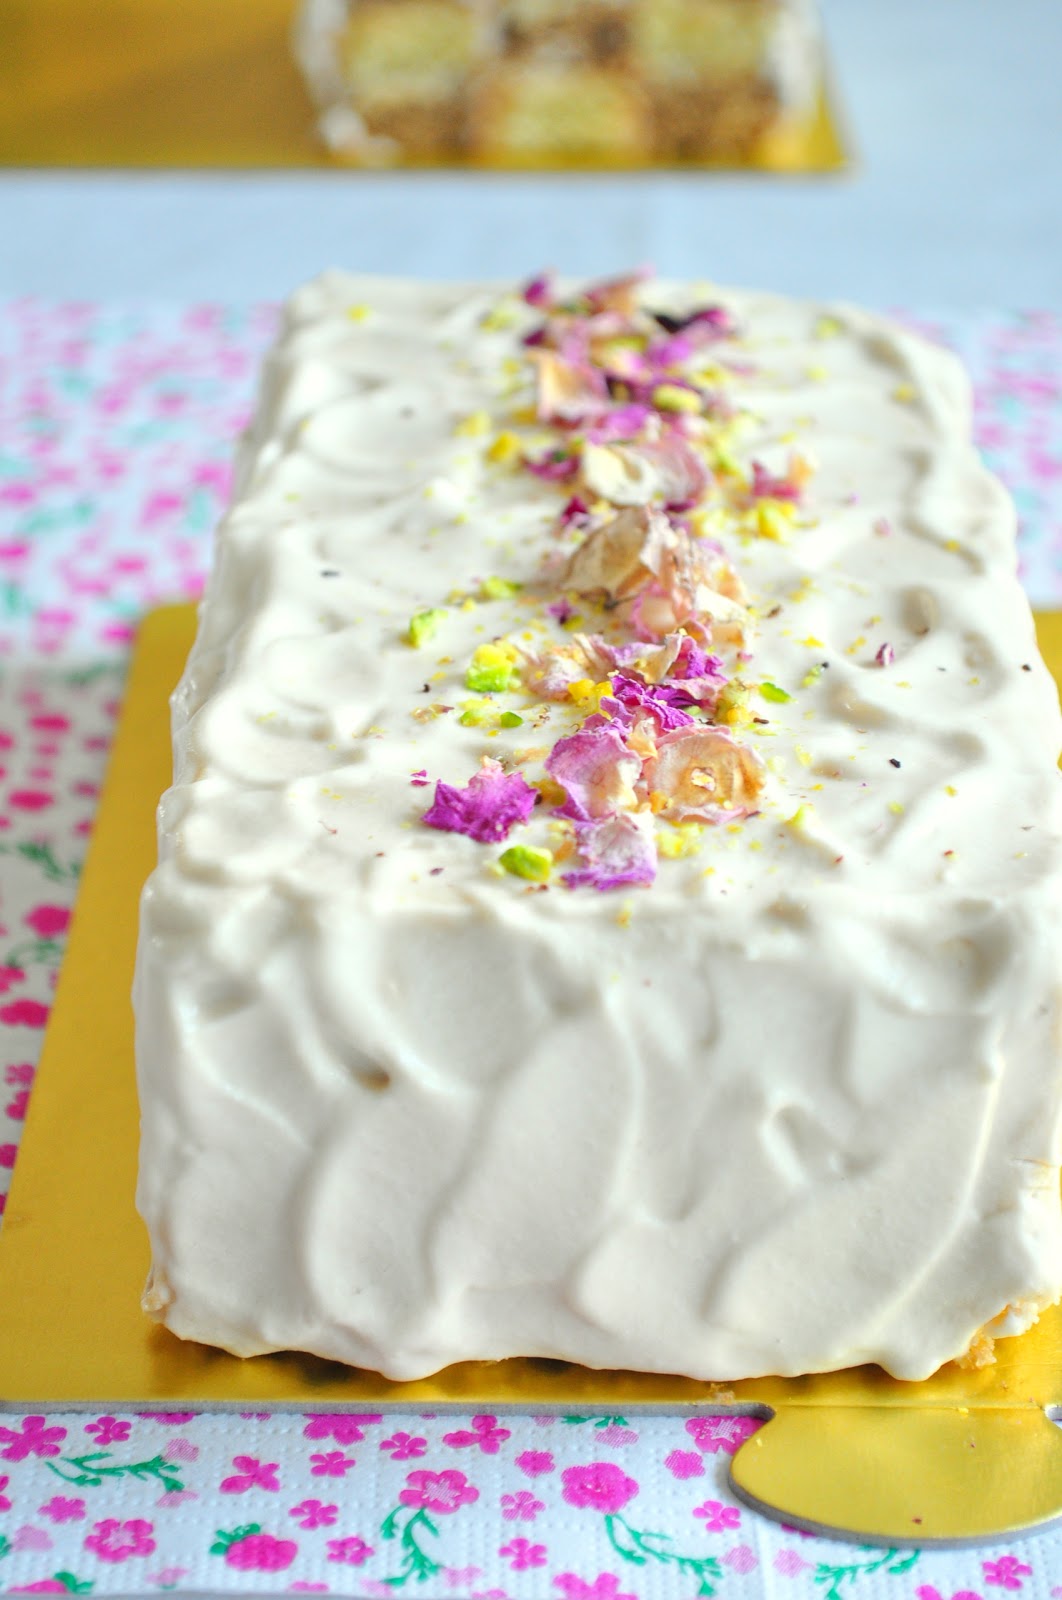
(clockwise from top left: banana mousse cake with rum chocolate joconde base and mango & kirsch biscuit joconde, opera, free-form berry open tart, banana caramel roll)
 
As for today, I thought I'll tell you about these wonderful rose and cranberry cookies, which I came across while looking for something I could make as wedding favours.  I'm not awfully big into rose flavor, but the idea of these cookies sounded so romantic and sweet.  The original recipe can be found here and I adapted it a little by adding in 1/4 tsp of rose essence.


What I love about these cookies is that the rose flavor is not overpowering.  In fact, you don't really smell the rose flavor until you bite into the cookies.  The cranberries add a chewy munch to the cookies.  It was perfect with a cup of coffee or tea.

Promise I'll be back soon!


Recipe below makes about 20 cookies

50g icing sugar
100g butter
1/4 tsp salt
180g all-purpose flour
1/4 tsp baking soda
1 cup dried rose petals
1/4 tsp rose essence
1/3 cup dried cranberries
approximately 1 tbsp cold water

Sift flour and baking soda together.  Soak rose petals in cold water to soften.  Cream together icing sugar, butter and salt.  Drain rose petals, keeping the water aside.  Add flour mixture, rose petals and essence into butter mixture.  Mix in the added ingredients, adding cold water a little at a time till dough starts to cling together to form a ball (you don't have to finish using the entire 1 tbsp of cold water.  Add cranberries towards the end when dough starts to come together. Roll dough between baking paper till its 0.5cm thick.  Chill for 20 minutes before cutting into rectangular or square pieces.  Bake in 165C preheated oven for 20 minutes, followed by 155C for another 10 minutes, till cookies are brown.


Saturday 9 June 2012

Rose, lychee & raspberry macarons

Oh no, I've accumulated quite a bit of a blogging backlog of the past month's bakes!  Not sure why, but lately I've been suffering from a bit of a block whenever I sit down to post.  Any advise?

Pink and girlie seems to be the common theme for this post and the one before on Hidemi Sugino's Mariee.  It was a pure coincidence.  Pink is such a lovely colour for macarons.  And yes, I have a thing for brightly coloured macarons.


This is another one from Pierre Hermé and is a combination of lychee, rose and raspberry flavours (he refers to this combination of flavors as ispahan).  As usual, PH recipes don't disappoint.  The only issue I had was the use of canned lychees as specified in the recipe - the lychee flavor wasn't as strong as I preferred and I'm not sure if using fresh lychees would make a difference.  Something I'll have to try to find out. 


Recipe below makes about 72 macarons, adapted from Pierre Hermé's "Macarons"

Raspberry jelly:
420g fresh raspberries
35g caster sugar
2 pcs gelatin leaves

Soak gelatin leaves in cold water.  Puree raspberries and sugar together, then strain.  Heat puree to about 45C and add gelatin leaves.  Pour into gratin dish lined with clingflim to a depth of about 4mm.  Leave to cool in room temperature then in freezer till set. Cut jelly into 1.5cm squares and return to freezer while working on the rest of the macarons.

Macaron shells:
300g ground almonds300g icing sugar
110g aged egg whites
approx 4g strawberry food colouring
approx 4g carmine red food colouring

For the Italian meringue:
- 300g caster sugar
- 75g mineral water
- 110g aged egg whites

Sift together icing sugar and ground almonds in a large bowl. Stir food colouring into egg whites, then pour into icing sugar and ground almonds but do not stir.
To make italian meringue, heat water & caster sugar to 118C.  At 115C, start whisking egg whites.  When sugar syrup reaches 118C, pour it over egg whites, whisking continuously till meringue to cools to 50C.  Fold meringue into ground almond-icing sugar mixture.  Spoon batter into piping bag. Pipe rounds of batter about 3.5cm in diameter, spacing them 2cm apart on lined baking trays. Rap baking trays on work surface to smooth out batter & remove any big air bubbles.

PH's instructions are to leave shells to stand for at least 30 minutes until they form a skin, then bake them in fan oven for 12 minutes at 180C.  From past experience this doesn't always work for me under Hong Kong's weather conditions, so instead I dry the piped batter for 15 minutes in the oven at 65C, then without removing the macarons, increase the temperature to 150C and bake for 14 to 15 minutes.  Either way, during the last 4 minutes of baking open and close the oven door twice to let out steam.  Once out of the oven, slide shells on to cooling rack and allow to cool completely before removing from silicon mat / parchment.

Lychee & rose ganache:
410g white chocolate, chopped
250g lychee puree
60g whipping cream

3g rose essence

Melt chocolate over bain marie.  Bring cream and puree to boil, then pour over chocolate in 3 batches.  Add rose essence and stir till smooth. Pour ganache into gratin dish and press clingfilm over the surface of ganache.  Set aside in fridge for ganache to thicken.

Assembly: 
Pipe a generous mould of ganache on shells and lightly press a cube of raspberry jelly into the centre.  Pipe a dot of ganache on top then cover with another shell.  Store macarons for 24 hours in fridge and bring out 2 hours before serving.

Tuesday 1 May 2012

Strawberry & pistachio mousse cake

Sometimes a girl just needs a girlie cake.  Something pink, light and fruity, ideally with a surprise in the center.  That is exactly what this strawberry and pistachio mousse cake is about.


This is another recipe from Hidemi Sugino's Le goût authentique retrouvé.  He calls this "Mariee".  I read somewhere that the ones he makes are so delicate that they have to be consumed at his shop and are not available for takeaway.  I'm not sure how true this is.  


I knew from my previous try at another one of his recipes that Hidemi Sugino tends to use very little gelatin in his mousses which is probably fine in colder and drier climates.  But with the mercury and humidity rising in Hong Kong, I was a little worried and used a little more gelatin than what was specified in the recipe.  The mousses still turned out tantalisingly soft.  The light green pistachio mousse centre is not visible until you cut into the cake, adding an element of sweet surprise.  The pistachio biscuit is unexpectedly moist and tasty - probably the best recipe for pistachio biscuit I've come across. 


Recipe below makes about 5 mini round cakes, adapted from Le goût authentique retrouvé by Hidemi Sugino (note: methodology below was inferred since I don't read Japanese, feel free to modify any step you deem appropriate)

Pistachio biscuit:
36g almond paste
15g pistachio paste
18g eggs
16g egg yolks
10g egg whites
For the french meringue:
- 32g egg whites
- 20g granulated sugar
18g corn starch
8g melted butter
Pistachio mousse:
80g whipping cream, whipped to soft peaks
8g pistachio paste
80g milk
1/10th vanilla bean
16g egg yolks
16g granulated sugar
1.2 piece gelatin sheet
Strawberry mousse:
170g whipping cream, whipped to soft peaks
170g strawberry pulp
97g italian meringue:
- 70g granulated sugar
- 18g water
- 35g egg whites 
3.6 pieces of gelatin sheets
34g eau de vie de framboise (raspberry brandy)
Sirop d'imbibage:
10g sirop
à 30°B
5g water

5g
eau de vie de framboise
Décor:
mirror gel

1. Pistachio biscuit:
Using an electric mixer, beat to combine almond & pistachio paste.  Add in eggs, egg yolks and egg whites gradually, whisking constantly until mixture is creamy and fluffy.  Fold in corn flour and melted butter.  For the french meringue, whisk egg whites and caster sugar together until stiff peaks form.  Fold french meringe into almond, pistachio & eggs mixture gradually in 3 batches.  Pour batter into baking sheet approximately 9 by 12 inch in size and bake in 230C preheated oven for 5 minutes.  Leave to cool before cutting out 5 x 5cm rounds.  There will be excess left over so you could use a smaller baking sheet and reduce the proportion of ingredients accordingly.

2. Pistachio mousse:
Place gelatin in cold water to bloom.  Heat pistachio paste, milk & split vanilla bean together in a pan until boiling, remove vanilla bean.  Whisk egg yolks & sugar together then pour in hot milk mixture, continuing to whisk to temper the egg yolks.  Heat milk & egg mixture until 84C, then mix in softened gelatin.  Strain pistachio cream and leave to cool.  Whisk whipping cream until soft peaks and fold into pistachio cream.  Pour into 7 inch round cake ring lined at the bottom with cling wrap.  Leave in fridge until set.  Cut out 4cm round pieces.  There will be quite a bit of excess left over but I found working with smaller proportions problematic. 

3. Sirop d'imbibage:
Mix all ingredients together.

4. Strawberry mousse:
Place gelatin in cold water to bloom.  Heat strawberry pulp but do not boil.  Mix in bloomed gelatin and leave to cool.  Mix in raspberry brandy.  Whisk whipping cream until soft peaks, set aside.  Prepare italian meringue by heating water and sugar until it reaches 118C.  At 115C, whisk egg whites until its foamy.  While continuing to whisk, pour in sugar syrup and whisk till stiff peaks form and italian meringue is ready.  Fold in italian meringue then whipping cream into strawberry puree.  

5. Assembly:
Ensure cake rings are well covered at the base with cling wrap.  Pour strawberry mousse into cake rings filling about 1/2.  Carefully place and center 1 piece of pistachio mousse disk into each cake ring, pushing slightly into the strawberry mousse to anchor but not all the way down.  Fill with remaining strawberry mousse until just slightly short of top of cake ring.  Brush pistachio biscuit with sirop d'imbibage before placing on top of strawberry mousse.  Wrap top of cake rings with cling wrap and press down with bottom of a baking sheet to flatten surface.  Leave to set in refridgerator.  Once set, turn over such that the end with the pistachio biscuit is at the bottom.  Top with mirror gel before removing from cake ring.  Decorate as desired.


Friday 20 April 2012

Crusty oatmeal bread


I had mentioned in one of my recent posts that we've been consciously incorporating quite a bit of oat into our daily diet, due primarily to my other half's committed effort to lower his cholesterol.  We've had quite a bit of oat-based muffins, pancakes, cookies, and most recently we made oatmeal bread!

This simple oatmeal loaf was so surprisingly good that I knew I had to share it here with all of you the minute I took my first bite.  Health benefits aside, what really surprised me was how crisp the crust turned out while the insides remained soft and moist.  I strongly recommend having this bread fresh out of the oven, once it has cooled slightly but still warm to the touch.  A day later the crust was still lovely but not as crispy as the day before.  Herr Scherrer made some pink salmon sandwiches with it for lunch and it was so yummy we regretted not making a bigger loaf as we ran out of bread!  I intend to try the recipe again soon, replacing a portion of the strong white flour with wholemeal flour.  


Recipe below makes 1 small loaf

Ingredients:
1 tsp dried yeast
175ml water
188g strong white flour
125g oatmeal (I grounded rolled oats in a food processer)
3/4 tsp salt
1/2 tsp honey

Method:
Sprinkle yeast into 50ml of water. Leave for 5 minutes then stir to dissolve. Mix flour, oatmeal and salt in a large bowl. Make a well in the centre and pour in yeast mixture and honey. Pour in remaining water in 2 to 3 batches while gradually mixing in the flour to form a stiff sticky dough. Turn the dough out on a lightly floured surface and knead till smooth and elastic. Put the dough into a clean bowl and cover with towel. Leave to rise until double in size, about 1.5 hours. Knock back, then leave to rest for 10 minutes. Shape dough into a loaf. Place on an oiled baking sheet or loaf tin and cover with towel. Prove until doubled in size, about 1 hour. Brush loaf with water and sprinkle some rolled oats over the top.  Bake in preheated 200 C oven for about 35 minutes until brown and hollow sounding when tapped underneath. Leave to cool on wire rack (out of loaf tin).

Tuesday 17 April 2012

Mini pistachio fraisier cakes

I received a pleasant surprise a couple of weeks ago from a good friend coming back from Switzerland.  He bought me a copy of Ladurée's Sucré: The Recipes!  

I've been wanting to get myself a copy for some time now, particularly after acquiring Ladurée's Savoury: The Recipes from a very charming bookshop in Duxton Hill (Singapore) called Littered with Books, which by the way is worth a visit.  The obvious lure of Ladurée recipes aside, these books are a delight to have for a number of other reasons: gorgeous pictures accompanying all recipes, it comes beautifully wrapped in soft crepe paper, has silver / gold page edges, velvety covers and packed in classic Ladurée pastel pink / mint green boxes.  You have to see it to know what I mean!  I almost bought a copy when I was in Ladurée's Zurich shop earlier in March but stopped myself when I realised it costs CHF60 and I could get it cheaper via amazon.co.uk at around GBP20.  Unknown to me my friend went to the same shop in Zurich a week after and got me a copy! I've now promised all sorts of dessert treats to him and his wife in return for the awesome gift!


The first recipe that I tried from the book is the pistachio Fraisier, which comprises almond génoise soaked with kirsch syrup, pistahio mousseline cream, fresh strawberries and pistachio almond paste.  The recipe is for an 8-inch round cake, but I had these new hexagonal mini cake rings that I've been wanting to use and decided to make mini versions of the Fraisier instead.  I also omitted the pistachio almond paste layer.

I thought the hexagonal shape moulds were quite suited given how the strawberries were laid out.  Taste wise, the pistachio mousseline turned out a little too sweet for my liking and I would definitely reduce the amount of sugar in the recipe if I were to make this again.  Other than that I think a pistachio lover would definitely take to this cake.  Strawberries could also be replaced with raspberries to make a Framboisier. 


Recipe below adapted from Ladurée's Sucré: The Recipes, makes around 3 mini cakes

Almond génoise cake
17g butter
67g cake flour
2 eggs
67g granulated sugar
17g ground almonds

Kirsch syrup
25ml water
25ml sugar
10ml kirsch liqueur
10ml raspberry liqueur

Strawberries
12 strawberries, of approximately equal size

Pistachio mousseline cream
45g butter
90g whole milk
1 egg yolk
25g granulated sugar
7g cornstarch
30g pistachio paste

Decoration
Gel mirror & fruits as desired

1. Almond génoise cake
Melt butter.  Whisk eggs and sugar over bain marie till it is about 50C, thick, pale and tripled in volume.  Remove from heat and continue whisking till mixture has cooled down.  Fold in flour, then ground almonds and butter.  Pour into cake pan (around 9-inch round to get 1cm thick génoise) and bake for approximately 20 minutes in 170C preheated oven.  Allow to cool before cutting out 3 pieces exactly the same size as the mini cake rings and 3 slightly smaller (i.e. 2 pieces per mini cake, 1 slightly smaller than the other).

2. Kirsch syrup
Bring water and sugar to a boil.  Allow to cool before adding in kirsch and raspberry liqueur.  

3. Strawberries
Slice 9 of the strawberries into halves, 6 halves for each mini cake.  Cut remaining 3 strawberries into thin slices.

4. Pistachio mousseline cream
Leave butter out to soften at room temperature.  Bring milk to a boil.  Whisk yolk and sugar till it pales slightly, mix in cornstarch.  Pour about a third of the hot milk into egg yolk mixture, whisking constantly throughout to temper the yolk, then pour mixture back into rest of milk and bring to a boil., stiring constantly.  Leave to cool for about 10 minutes before mixing in half of the butter.  When cream has cooled to room temperature blend in pistachio paste and other half of the butter, using a electric mixer if necessary, till cream is smooth. 

5. Assembly
Place larger pieces of cut génoise pieces at bottom of mini cake rings and lightly soak with syrup.  Pour a thin layer of pistachio mousseline cream over génoise up to about 1cm high.  Arrange strawberry halves along the inside of the cake ring (as shown in pictures), cut side against the side of the cake ring, pushing them down into the cream.  Fill centre with thinly sliced strawberries, also pushing into the cream.  Cover strawberries with more mousseline cream, then place in second (smaller) piece of cut génoise on the cream before filling with remaining mousseline cream till top of cake ring.  Refridgerate till set before removing from cake ring.  Top with gel mirror and fruits as desired.


Friday 6 April 2012

Pistachio & raspberry macarons (PH's Montebello)


I guess it's about time for another try of Pierre Hermé's macaron recipes. =D  This time, I really wanted to try one with a jelly insert.  The Montebello macaron caught my eye for its contrasting colours and the pairing of pistachios and raspberry flavors sounded so intriguing.


I was initially a little hesitant about the recipe after realizing how much colouring I had to add for the red shells - 11g worth compared to 3g for the green shells! I've never used up so much colouring on a single batch of macarons much less for half a batch.  Then I thought - its PH so I just need to trust it.  On hindsight I had nothing to worry about coz the red shells couldn't have turned out any better! 

The tanginess of the raspberry jelly really adds a lovely twist to the pistachio ganache.  Who would have thought pistachios and raspberry could pair so well?


There was a little hiccup was when I tried sprinkling some crushed pistachios on some of the green shells.  For some reason the ones with sprinkled crushed pistachios all had cracked tops whilst those without were fine, yet they all came from the same batch of batter.  Strange?

Have a good Easter everyone!

Recipe below makes about 72 macarons, adapted from Pierre Hermé's "Macarons"

Raspberry jelly:
300g fresh raspberries
60g caster sugar
2 pcs gelatin leaves

Soak gelatin leaves in cold water.  Puree raspberries and sugar together, then strain to remove pips.  Heat puree to about 45C and add gelatin leaves, stiring to incorporate.  Pour into gratin dish lined with clingflim to a depth of about 4mm.  Leave to cool 1 hr in room temperature then in freezer for 2 hours. Cut jelly into 1.5cm squares and return to freezer while working on the rest of the macarons.

Macaron shells:
Green shells:
150g ground almonds
150g icing sugar
55g aged egg whites
1g yellow food colouring
2g green food colouring

Red shells:
150g ground almonds
150g icing sugar
55g aged egg whites
11g raspberry red food colouring

Italian meringue:
- 300g caster sugar
- 76g mineral water
- 110g aged egg whites
- 1.5 tsp egg white powder (added to second portion of egg whites.  PH doesn't use egg white powder in his recipes in the book but he recommends using egg whites that have been aged for at least a few days.  I tend to add egg white powder to my egg whites if I didn't have the chance to age them enough.  It helps to strengthen the protein bonds that form when you whisk the whites and gives the same effect as using aged egg whites.)

For the shells, sift together icing sugar & ground almonds in a large bowl. Stir respective food colouring into egg whites, then pour mixture into icing sugar & ground almonds but do not stir.
To make italian meringue, bring water & caster sugar to boil at 118C.  At 115C, start whisking second portion of egg whites (with egg white powder, if applicable).  When sugar syrup reaches 118C, pour it over egg whites, whisking continuously till meringue to cools to 50C.  Separate meringue into 2 equal batches and fold each batch separately into red and green/yellow ground almond-icing sugar mixture.  Spoon each batch of batter into separate piping bag fitted with plain nozzle.
Pipe rounds of batter about 3.5cm in diameter, spacing them 2cm apart on lined baking trays.  Rap baking trays on work surface covered with kitchen cloth. 

PH's instructions are to leave shells to stand for at least 30 minutes until they form a skin, then bake them in fan oven for 12 minutes at 180C.  From past experience this doesn't always work for me under Hong Kong's weather conditions, so instead I dry the piped batter for 15 minutes in the oven at 65C, then without removing the macarons, increase the temperature to 150C and bake for 14 to 15 minutes.  Either way, during the last 4 minutes of baking open and close the oven door twice to let out steam.  Once out of the oven, slide shells on to cooling rack and allow to cool completely before removing from silicon mat / parchment.

Pistachio ganache:
225g whipping cream
225g white chocolate
35g pistachios

Blend pistachios with whipping cream in electric food processer.  Melt chocolate.  Bring cream & pistachios to boil and pour it over the chocolate in batches.  Stir till smooth. Pour ganache into gratin dish and press clingfilm over the surface of ganache.  Set aside in fridge for ganache to thicken.

Assembly: 
Spoon ganache into piping bag fitted with plain nozzle.  Pipe a generous mould on either the red or green shells and lightly press a cube of raspberry jelly into the centre.  Pipe a dot of ganache on top then cover with another shell of different colour.  Store macarons for 24 hours in fridge and bring out 2 hours before serving.

Thursday 29 March 2012

Citrus & coffee checkered loaf with coffee flavored chantilly cream, and snippets of Switzerland


Week before last was all about enjoying the start of spring in Herr Scherrer's home country, Switzerland.  White snow had given way to a beautiful mix of green, brown and red all around lake Zurich and nearby towns and cities.  The skies were clear blue for the entire time we were there.  It was lovely to enjoy the abundant nature and country side (something we don't get much of in Hong Kong).  We've been making regular trips to Switzerland for a number of years now, and its always something I look forward to very much.  Who knows maybe one day we'll decide to make it home? When there are kids to think of perhaps?


We went to our usual favorite food haunts, e.g. Brasserie Lipp, Schlüssel poulet, just to name a few.  There were of course the must-do visits to Sprüngli and Ladurée and Läderach. Yum yum!


We also spent a few days in Zermatt, where there were still plenty of snow for skiing on the slopes from the Klein Matterhorn and Gornegrat.  As you can see in the picture below, there was not a single cloud in the sky!  


We took lazy drives out to catch sights of the Rhine river, stopping for relaxing bites along the way and just simply enjoying the fresh air and good weather. 


And there were lazy strolls through old streets of Schaffhausen, admiring the intricate artwork on the external walls of buildings.


Upon returning to Hong Kong I made a citrus and coffee flavored checkered loaf cake using fatless whisked sponge.  There is no butter or oil in the sponge recipe.  I paired it with coffee flavored chantilly cream, topped with dried rose petals and crushed pistachios.  The resulting presentation makes it so suitable for Spring, don't you think?


Recipe below makes 2 mini checkered loaf measuring approximately 7" by 3.5" each

Fatless whisked sponge cake:
4 eggs
160g sugar
140g all-purpose flour
pinch of salt
1 tbls instant coffee powder
grated rind of 1 orange

Coffee flavoured creme chantilly:
320g whipping cream
75g granulated sugar
1 tsp instant coffee powder

Decoration:
dried rose petals
crushed pistachios

1. For the coffee flavored whisked sponge cake: Dissolve instant coffee powder in 1 tbls boiling water and set aside to cool slightly.  Whisk 2 eggs, 80g sugar and coffee mixture in heatproof bowl to mix in the ingredients.  Placing bowl over a pan of hot water and continue to whisk egg mixture till its turns pale and holds a clear trail of ribbon batter on surface.  Remove bowl from pan and continue to whisk till mixture cools.  Fold in 70g flour in 3 batches.  Pour into lined / greased pan (I used a 8" by 8" size square pan) and bake for 15 to 17 minutes in 170C preheated oven until sponge is firm but springy.  Transfer cooked sponge to cool on wire rack.  
2. For the citrus flavored whisked sponge cake: Follow the same procedure above with remaining 2 eggs and 80g sugar, except replacing coffee mixture with grated orange rind.
3. For the creme chantilly: Put all ingredients in a mixing bowl.  Whisk on medium speed till cream is thick enough to spread (slightly more than soft peak). 
4. Assembly: cut and trim each of the coffee and citrus sponge into 9 pieces of 1.5cm tall strips, i.e. 9 strips of coffee sponge and 9 strips of citrus sponge.  Arrange strips to form 2 checkered loaf, using 9 strips per loaf (strips are placed 3 by 3 with longer edge on the horizontal plane - see photos). Ensure the coffee and citrus strips alternate to create checkered effect and fill with creme chantilly between the strips to hold them together.  Using a spatula, frost top and sides of checkered loaf with remaining creme chantilly.  Finish with back of a spoon to create textured surface.  Top with dried rose petals & crushed pistachios (or any other decorative items u desire).


Friday 9 March 2012

Coffee & caramel mousse cake

I first heard about Hidemi Sugino's book "Le goût authentique retrouvé" in 2005 from Keiko, on her blog.  This was before I knew about his shop in Tokyo.  Keiko is such a talented baker and I've been so inspired reading about Keiko's many creations from Le goût authentique retrouvé.  I've always had a special spot for these pretty multi-layered/textured pretty french-style mousse cakes (or simply entrements as some may call it).  Unfortunately, Hidemi Sugino's book is in Japanese and given he hasn't release an English version since the book was first commissioned in 1998, it is unlikely he will ever do so. 


So fast forward seven years to 2012, a few months ago I was researching into a coffee and caramel mousse cake combination and couldn't really find anything good among all the cookbooks and materials I've gathered over the years (unbelievable as it may sound for the number of cookbooks I have).  I knew Hidemi Sugino had one in his book as Keiko blogged about it before.  Its one called Brésilienne that he still offers it  in his patisserie shop.  Japanese-literate or not, I decided I'll get the book first and think more later.  I knew from Keiko that the ingredients were also listed in French, so at the minimum I would be able to understand that bit. 

The book arrived 3 days later and I was so elated to find it containing many recipes for different mousse cakes and they all look so delicious.  There is so much in the book I can't wait to try.  Although its all in Japanese, there are step by step photos accompanying the recipes.  True I couldn't understand the methodology written in Japanese, but based on the ingredients, it wasn't that difficult figuring out on my own what to do with the ingredients.  The step-by-step photos also help.  


So I finally got to try a coffee and caramel mousse combination thanks to Hidemi Sugino.  And I was truly impressed!  The coffee mousse tasted a little bitter on its own, but when paired with the sweet caramel mouse, it was a surprise burst of flavor on the palate.  The coffee biscuit joconde was also very moist given all the cognac syrup that was added to it, and complimented both mousses well.


The cake ring that Hidemi Sugino uses is almost impossible to find - I had to settle on an oval shaped one which made the cake look like a fat version of his tall & slim model.   I could have also done better on the proportion of coffee to caramel mousse so that the 2 layers are of equal height.  Lastly, I believe Hidemi Sugino uses very little gelatin in his recipes so his mousses are very soft and lovely, which was indeed the case when I tried this recipe, but the downside is it may not last a trip out of the house, especially in more hot & humid weathers.  I will most likely increase the proportion of gelatin next time, especially if I know the cake will need to do some travelling.

Its been nothing but gloomy cloudy days in Hong Kong the past week and I was really frustrated trying to find enough natural light to take some of these photos... hopefully they don't look too gloomy to you.

Continue for recipe:

Friday 2 March 2012

Passion fruit & milk chocolate macarons

Ever since I tried a raspberry chocolate macaron from Jean-Paul Hévin a couple of weeks ago (they have outlets in HK), I've been reminising the complimentary taste of chocolate with tanginess of the raspberry.  It reminded me a lot of Pierre Hermé's Mogador macarons, which as most of you know is a mix of milk chocolate and passion fruit hence having some similarity in terms of taste from the blend of chocolate with tangy fruit.

Now that I've gotten my own copy of PH's Macarons book, I thought its time I tried recreating these Mogador macarons.  Its probably one of the easier recipes in the book when it comes to sourcing for ingredients.  Passion fruits are much much easier to find compared to exotic stuff like Tuber Melanosporum black truffles or Aceto Balsamico Di Modena, listed as ingredients for some of the more unusual macarons...What can i say, its PH afterall...


I had a little problem with the food colouring though - if you've already noticed from the pictures, my macarons turned out a little more orange than yellow.  I guess I might have over did it a little on the red food colouring =P.  Still, its such a joy churning out bright coloured macarons, just looking at them makes me happy!  And they taste sooo yummy too! 


Recipe below makes about 36 macarons, adapted from Pierre Hermé's "Macarons"

Macaron shells:
150g ground almonds
150g icing sugar
55g aged egg whites (first portion)

approximately 2.5g yellow food colouring
approximately 1/4 tsp red food colouring (adjust this according to how strong the food colouring you're using is, or you could get orange instead of yellow macarons like me!)

For the italian meringue:
- 150g caster sugar
- 37.5g mineral water
- 55g aged egg whites (second portion)
- 1.5 tsp egg white powder (added to second portion of egg whites.  PH doesn't use egg white powder in his recipes in the book but he recommends using egg whites that have been aged for at least a few days.  I tend to add egg white powder to my egg whites if I didn't have the chance to age them enough.  It helps to strengthen the protein bonds that form when you whisk the whites and gives the same effect as using aged egg whites.)

Finish: cocoa powder

Sift together icing sugar & ground almonds in a large bowl. Stir food colouring into first portion of egg whites, then pour mixture into icing sugar & ground almonds but do not stir.
To make italian meringue, bring water & caster sugar to boil at 118C.  At 115C, start whisking second portion of egg whites (with egg white powder).  When sugar syrup reaches 118C, pour it over egg whites, whisking continuously till meringue to cools to 50C, then fold into ground almond-icing sugar mixture.  Spoon batter into piping bag fitted with plain nozzle.
Pipe rounds of batter about 3.5cm in diameter, spacing them 2cm apart on lined baking trays.  Rap baking trays on work surface covered with kitchen cloth.  Using a sieve, sprinkle cocoa powder lightly over shells.  

PH's instructions are to leave shells to stand for at least 30 minutes until they form a skin, then bake them in fan oven for 12 minutes at 180C.  From past experience this doesn't always work for me under Hong Kong's weather conditions, so instead I dry the piped batter for 15 minutes in the oven at 65C, then without removing the macarons, increase the temperature to 150C and bake for 14 minutes.  Either way, during the last 4 minutes of baking open and close the oven door twice to let out steam.  Once out of the oven, slide shells on to cooling rack and allow to cool completely before removing from silicon mat / parchment.

Passion fruit & milk chocolate ganache:
50g "La Viette" butter (or your preferred unsalted butter), at room temperature
275g Valrhona Jivara chocolate or milk chocolate, 40% cocoa solids
125g passion fruit juice

Cut butter into pieces and chop up chocolate.  Halve passion fruits and scoop seeds out with a spoon.  Strain to obtain juice.  Bring juice to boil.
Partially melt chopped chocolate bain marie.  Pour hot juice over chocolate a third at a time.
When temperature reaches 60C, add pieces of butter a few at a time.  Stir to obtain a smooth ganache.  
Pour ganache into gratin dish and press clingfilm over the surface of ganache.  Set aside in fridge for ganache to thicken.

Assembly: 
Spoon ganache into piping bag fitted with plain nozzle.  Pipe a generous mould on half of the shells and top with remaining half.  Store macarons for 24 hours in fridge and bring out 2 hours before serving.


Wednesday 22 February 2012

Lavender macarons

Pierre Hermé's "Macaron" book in English finally arrived a couple of weeks ago.  It was a looonnng wait!  I eagerly sat down the minute I had time to flip through the pages, admiring not just the innovative (& sometimes legendary, if I may say) pairing of flavours but also the many beautiful photographs of macarons presented in the book.


I have a handful of macaron books at home and none of them has the sort of facinating recipes presented by this talented chef.  I'm truly in awe! 

A few months ago I purchased a bag of lavender buds and the idea of lavender flavored macarons have been swirling in my head ever since.  I was hoping to find a lavender related macaron recipe in Pierre Hermé's book, but unfortunately none of the 57 macaron recipes in the book used lavender. : ( 


Not one to give up so easily, I decided to reference PH's macaron recipes to put together a lavender flavoured macaron.  I followed one of his instructions for basic macaron shells, but used purple food colouring instead of the colour that was stated in the original recipe.  For the filling I thought of lavender infused white chocolate ganache and thankfully PH had an earl grey tea ganache that I could use as a close reference.


I'm pretty happy with my humble PH inspired Lavender macarons, if I could call them that.  The taste of lavender is distinct but not overpowering.  In the book PH shares that he finds white chocolate has "splendid flavour-carrying properties" and "has the advantage of receding into the background and bringing out the taste of ingredients that are added to it".  A great tip!!  PH has clearly illustrated that a macaron is a french cookie with endless possibilities.  As I often see written in articles about macarons: "Ladureé reintroduced macarons and made them world famous, Pierre Hermé reinvented them"...  I bought some passionfruit on my way home today - I can't wait to try out PH's famous Mogador macaron next!


Thursday 16 February 2012

Simple & quick oat cinnamon cookies


For a couple of weeks now we've been having a bit of a oat and bran craze at home.  Mostly due to my better half's strong desire to lower his cholesterol level (oats are supposedly good for that). 


One morning he sweetly asked me if I could make him some oat cookies.  It was such a simple request, I couldn't possibly refuse... also, its not as if I need a strong reason to head into the kitchen to bake...


This is a really simple & quick to make recipe - good if you simply want to enjoy the taste of oats and with a bit of cinnamon. I baked 1/3 of it and froze the other 2/3 in the freezer for future yum yum!


Recipe below makes about 30 cookies

115g butter, chopped & softened
95g granulated sugar
95g brown sugar
1 egg
1/2 tsp vanilla essence
130g self raising flour, sifted
1/2 tsp ground cinnamon
120g instant oats

Beat butter, granulated sugar and brown sugar together with electric mixer until creamy.  Beat in egg then stir in vanilla.  Combine flour, baking soda, salt, and cinnamon.  Mix into butter mixture until dry and wet ingredients are well incorporated.  Stir in oats.  
Roll flat tablespoon quantity of dough into balls.  Place 5cm apart on greased baking sheet.  Flatten dough balls slightly with spoon.  Bake for 9 to 10 minutes in 190C preheated oven.  
Allow cookies to cool on baking sheet for a few minutes before transferring to wire rack to cool completely (cookies will initially be too soft to transfer to wire rack but will harden as it cools).  
(If dough appears too soft / butter begins melting while you are working on it, just cover dough with plastic and chill in fridge for about 15 minutes before working on it again.)

Monday 13 February 2012

Azuki mousse & matcha genoise cake


I had another Japanese themed inspiration following one of my recent post here of sesame chiffon cake and Niseko, Japan. 


This time, its azuki beans.  I've always had something for azuki bean flavored desserts.  My dad loves those asian style azuki bean ice popsicles and as a kid I would often find some in the freezer at home.  It was a memorable cold treat after a hot sunny day in Singapore.


I wanted to recreate the childhood memory, and an important part of it is using whole beans (sweetened from a can) instead of azuki bean puree, so that one could enjoy the munch of whole beans, resembling the taste of whole azuki beans in the ice popsicles my dad used to buy.


Everthing else was kept simple to ensure the taste of azuki beans were clearly distinct.  The azuki bean mousse was paired with matcha génoise. 


Recipe below makes about 4 mini cakes

Matcha génoise:
2 egg
40g granulated sugar
35g plain flour, sifted
7g matcha powder (sifted together with flour)
20g butter
(There will be left over génoise but I find its easier to work with these quantities than something smaller.  You could half the ingredients and there would still be enough génoise for about 4 mini cakes.  Extra génoise can be wrapped in plastic and kept in the fridge for other uses.)

Preheat oven to 180 C.  Hand-whisk eggs and sugar over bain marie till mixture reaches 40 C.  Using an electrical whisk, beat eggs and sugar on high speed till fluffy and peaks form.  Melt butter over bain marie.  Fold flour & matcha into egg mixture in 3 batches.  Be careful not to overmix. Add a scoop of egg & flour mixture into melted butter and mix well.  Fold butter mixture back into remaining egg & flour mixture and fold gently till batter surface is uniformly shiny.  Pour & spread evenly into approximately 8 by 11 inch lined cake tin and bake for about 16 to 18 mins (if you are using half the quantity, use a smaller cake tin so your génoise would still have sufficient thickness).  Invert cake onto a wire rack and let cool before cutting out pieces of génoise rounds (or squares depending on your cake ring) that is slightly smaller than the cake ring you are using.  Place génoise rounds at the bottom of lined cake rings.  Set aside.

Azuki mousse:
2 gelatin sheets
180g azuki beans, sweetened (from a can)
180g whipping cream

Soak gelatin sheets in cold water till bloomed. Melt gelatin over bain marie and stir into azuki beans.  Whisk cream on medium speed till soft peak forms.  Fold cream into azuki beans mixture.  Pour over matcha génoise in cake rings and leave it fridge until set.

Finish:
Remove mousse from cake ring (using hot towel or flame torch on external of ring to loosen mousse).  Wrap with dark chcolate and top with fruits and sprinkle of crushed pistachios as desired.


LinkWithin

Related Posts with Thumbnails